Learning a handstand is one of the most exciting goals in gymnastics and fitness. A handstand may look simple when an experienced gymnast performs it, but holding your body upside down requires balance, strength, flexibility, coordination, and patience. The good news is that anyone can learn a handstand with regular practice and the right technique.
If you are wondering how to learn a handstand step by step, this guide will help you understand the basic skills, exercises, and progressions you need. Whether you are a complete beginner or already have some gymnastics experience, following a structured handstand training routine can help you improve safely and confidently.
What Is a Handstand?
A handstand is a body position where you support your entire body weight on your hands while your feet point toward the ceiling. Your arms remain straight and strong while your shoulders, hips, knees, and ankles work together to create a balanced line.
A good handstand is not only about getting your feet off the floor. The main goal is to control your body while maintaining proper alignment. Learning this position can improve upper body strength, body awareness, balance, coordination, and gymnastics skills.
Build the Strength You Need
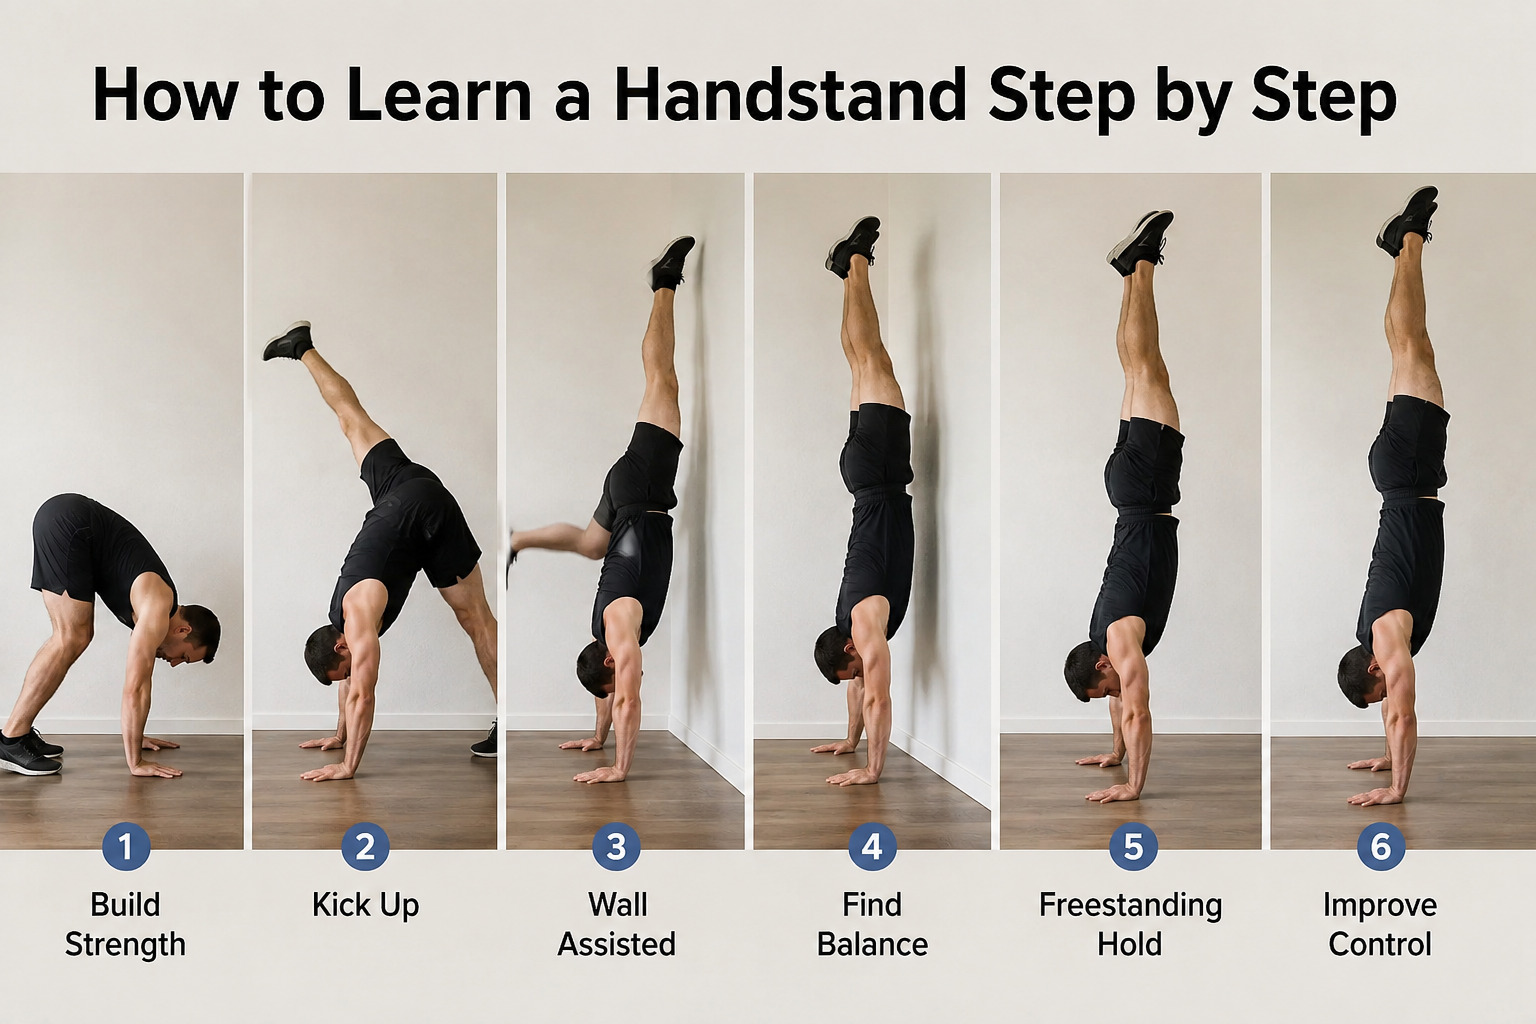
Before practicing a handstand, it is important to develop enough strength to support your body weight. Your wrists, arms, shoulders, and core all play an important role.
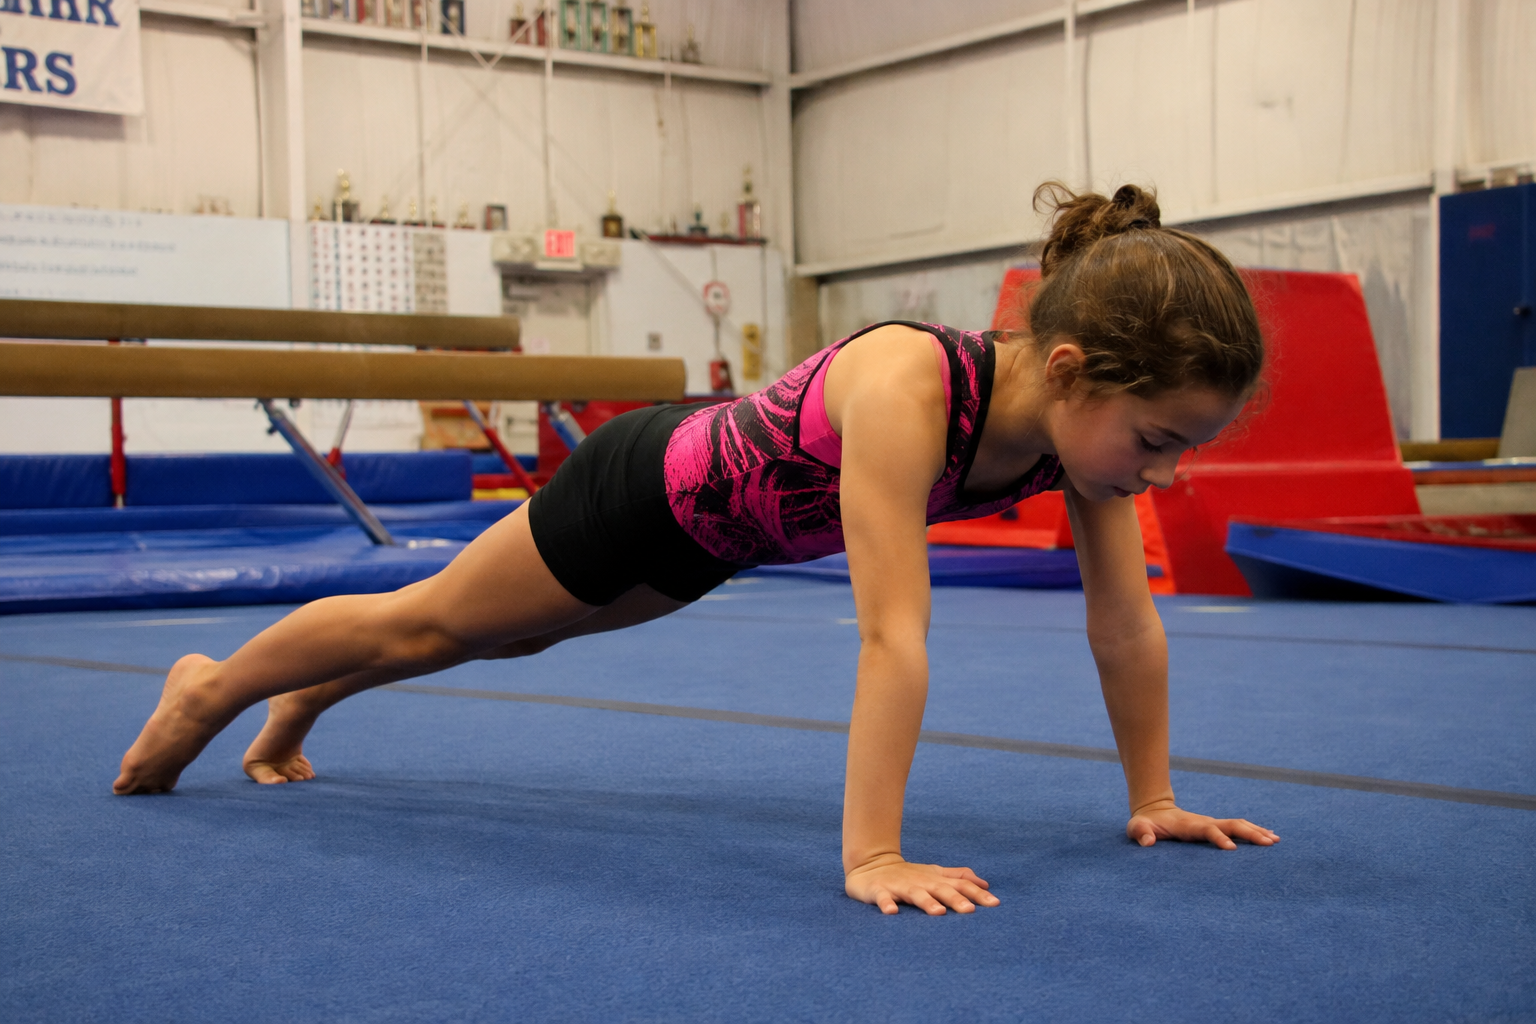
Start with simple exercises such as push ups, plank holds, shoulder taps, and hollow body holds. You can also practice wall walks if you are comfortable moving your body toward an upside down position.
Try holding a plank for twenty to thirty seconds and gradually increase the time as your strength improves. Strong shoulders are especially important because they help keep your body elevated while your hands remain firmly on the floor.
Improve Your Wrist Strength
Your wrists carry a lot of pressure during a handstand, so wrist preparation should be part of your training routine. Begin with gentle wrist circles and stretches before putting your full body weight on your hands.
You can also place your hands on the floor and slowly shift your body weight forward and backward. Keep the movement controlled and avoid forcing your wrists into an uncomfortable position.
Regular wrist conditioning can make handstand practice more comfortable and help prepare your hands for repeated training.
Practice Your Hand Position
Hand placement can make a major difference when learning a handstand. Place your hands approximately shoulder width apart with your fingers spread wide. Your fingers should point forward or slightly outward depending on what feels natural and stable.
Press your fingertips into the floor when you feel yourself moving too far forward. Your fingers act like small brakes that help you control your balance.
Avoid placing your hands too close together because this can make the position less stable. At the same time, placing them extremely wide can make it harder to create a strong body line.
Learn the Wall Handstand First
For most beginners, the wall handstand is one of the best ways to start. A wall provides support while you learn how it feels to hold your body upside down.
Start with your hands on the floor a short distance away from the wall. Carefully kick one leg upward and allow your feet to touch the wall. Once your legs reach the wall, straighten your arms and look toward the floor between your hands.
Try to create a straight line from your hands through your shoulders, hips, knees, and feet. Hold the position for ten to twenty seconds at first.
As you become more comfortable, increase your holding time. The goal is not simply to stay against the wall for a long period. You should focus on improving your alignment and body control.
Practice Wall Walks
Wall walks are another useful exercise for beginners learning how to do a handstand. Begin in a push up position with your feet close to a wall. Slowly walk your feet upward while walking your hands closer to the wall.
Continue until your body reaches a comfortable upside down position. Hold it briefly and then slowly walk back down.
This exercise strengthens your shoulders and arms while helping you become comfortable with being upside down. Perform the movement slowly because rushing can make it difficult to maintain control.
Learn the Kick Up
Once you feel comfortable with wall handstands, you can start practicing your kick up. The kick up is the movement used to bring your body from the floor into a handstand.
Place one foot slightly forward and keep your hands ready on the floor. Bend the front leg slightly and use it to create a controlled push while your other leg swings upward.
Do not try to kick as hard as possible. Too much force can cause your legs to pass over your body and make you lose control. Instead, practice using small and controlled movements.
You may need many attempts before finding the right amount of force. This is completely normal when learning a handstand.
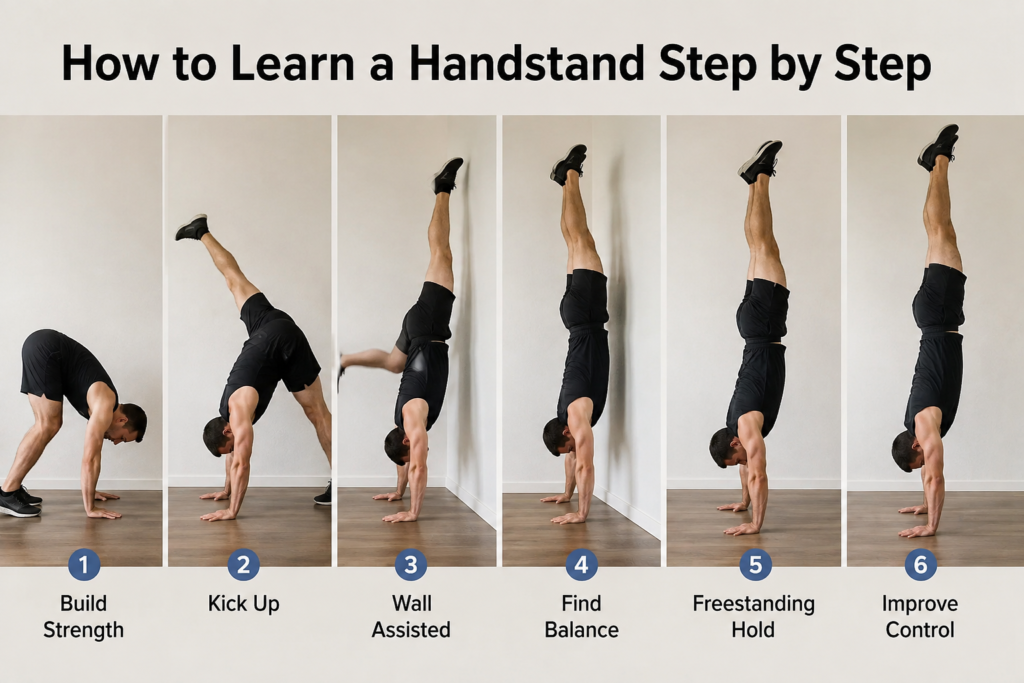
Focus on Body Alignment
Good alignment is one of the most important parts of handstand training. Try to keep your shoulders pushed upward, your arms straight, and your core engaged.
Avoid allowing your lower back to bend excessively. This creates a curved position that can make balancing more difficult.
Think about squeezing your legs together and pointing your toes toward the ceiling. Keep your stomach engaged and maintain tension throughout your body.
A straight and controlled body position makes it easier to find your balance.
Learn How to Balance
Handstand balance comes mainly from your hands, fingers, shoulders, and body position. When your body starts moving forward, press your fingertips into the floor. When you begin moving backward, adjust your hands and shoulders to bring your body back toward the center.
At first, you may only hold a handstand for one or two seconds. That is normal. Instead of becoming frustrated, focus on gradually increasing your control.
Short practice sessions can be more useful than trying to hold a handstand for a long time when your technique is breaking down.
Practice Handstand Holds Without the Wall
When you can comfortably hold a wall handstand, start trying short freestanding attempts. Give yourself enough open space and practice on a suitable surface.
Kick up gently and try to find your balance. If you lose control, safely return one foot to the floor at a time.
You should expect to fall many times while learning. Falling is part of the learning process, but always practice in a safe environment and avoid attempting advanced skills without proper instruction.
Improve Your Shoulder and Core Control
A strong core helps prevent unnecessary movement while you are upside down. Exercises such as hollow body holds, dead bugs, plank variations, and controlled leg raises can help develop core stability.
For your shoulders, exercises such as pike push ups and wall handstand holds can be useful. Focus on controlled movements rather than completing a large number of repetitions.
The stronger and more stable your shoulders and core become, the easier it will be to maintain a consistent handstand position.
Common Handstand Mistakes
Many beginners make similar mistakes when learning a handstand. One common mistake is bending the elbows. Your arms should remain straight and active throughout the position.
Another mistake is kicking too aggressively. A powerful kick does not automatically create a better handstand. Controlled movement is more important.
Allowing the back to arch too much is another common problem. Keep your core engaged and think about bringing your ribs toward your hips.
Some beginners also look too far forward. Keep your head in a neutral position and look at the floor between your hands.
How Often Should You Practice?
Consistency is more important than extremely long training sessions. Beginners can practice handstands several times each week for around fifteen to thirty minutes.
Start with a warm up, followed by wrist preparation, strength exercises, wall handstands, kick up practice, and short balance attempts.
Give your body enough time to recover if your wrists, shoulders, or other areas become excessively tired or uncomfortable. Quality practice is better than forcing yourself to continue when your technique is getting worse.
Stay Patient With Your Progress
Learning a handstand can take different amounts of time for different people. Some people may achieve a few seconds of balance quickly, while others may need weeks or months of consistent practice.
Do not compare your progress with another gymnast. Focus on your own improvement.
You can track your progress by recording how long you can hold a wall handstand, how many controlled kick ups you can perform, and how often you can balance without support.
Small improvements eventually add up to major progress.
Safety Tips for Handstand Training
Safety should always be a priority when practicing a handstand. Use enough open space and remove objects that could cause injury if you lose balance.
Warm up your wrists, shoulders, and body before training. If possible, learn under the guidance of a qualified gymnastics coach, especially when you are completely new to gymnastics.
Avoid practicing through sharp pain. Normal muscle effort is expected, but pain can be a sign that you need to stop and assess your technique.
Learning how to safely come out of a handstand is also important. Practice controlled exits so that you do not panic when you lose your balance.
Final Thoughts
Learning a handstand step by step requires strength, balance, coordination, flexibility, and patience. Start by preparing your wrists and building upper body and core strength. Then practice wall handstands, wall walks, controlled kick ups, and eventually freestanding handstand holds.
Remember that a handstand is a skill that improves through repetition. You do not need to master it in a single week. Focus on good technique, practice consistently, and celebrate small improvements along the way.
With regular handstand training and a positive attitude, you can gradually develop the strength and balance needed to hold a confident handstand. The most important part is to practice safely, stay patient, and enjoy the process of learning this impressive gymnastics skill.